RemoteIoT Web SSH Tutorial: A Beginner’s Guide To Securely Accessing Your IoT Devices
Are you ready to dive into the world of remote IoT device management? If you're here, chances are you've heard about Web SSH and its power to transform how we interact with IoT devices. But don't worry if you're new to this—this tutorial will break it all down for you step by step. Whether you're a tech enthusiast or just starting out, understanding RemoteIoT Web SSH can open up a world of possibilities.
Let’s be honest, managing IoT devices remotely can sometimes feel like trying to navigate a maze blindfolded. But with tools like Web SSH, you can simplify the process and make it secure. This tutorial isn’t just about teaching you how to use RemoteIoT Web SSH; it’s about empowering you to take control of your IoT ecosystem without breaking a sweat.
So, buckle up! We’re going to cover everything from the basics of Web SSH to advanced tips that’ll make you feel like a pro in no time. By the end of this guide, you’ll have the skills to remotely access your IoT devices with confidence—and maybe even impress your friends with your newfound tech wizardry.
Read also:Unveiling The Extraordinary Life Of Albert Brown Iv A Modernday Legend In The Making
Table of Contents
- What is Web SSH?
- Why Use Web SSH for Remote IoT?
- Getting Started with RemoteIoT Web SSH
- Securing Your Web SSH Connection
- Common Issues and Troubleshooting
- Advanced Features of RemoteIoT Web SSH
- Integrating Web SSH with IoT Platforms
- Best Practices for Remote IoT Management
- Real-World Use Cases
- Future of RemoteIoT Web SSH
What is Web SSH?
Alright, let’s start with the basics. Web SSH is like a bridge that connects you to your IoT devices through a browser. Instead of relying on traditional SSH clients, you can now access your devices using just a web interface. This makes it super convenient, especially when you’re on the go and don’t have your favorite SSH tool handy.
Here’s the deal: SSH (Secure Shell) is already a rock-solid way to manage remote devices securely. But Web SSH takes it up a notch by making it accessible via any device with a browser. This means you can control your IoT devices from your phone, tablet, or even a public computer—without installing anything extra.
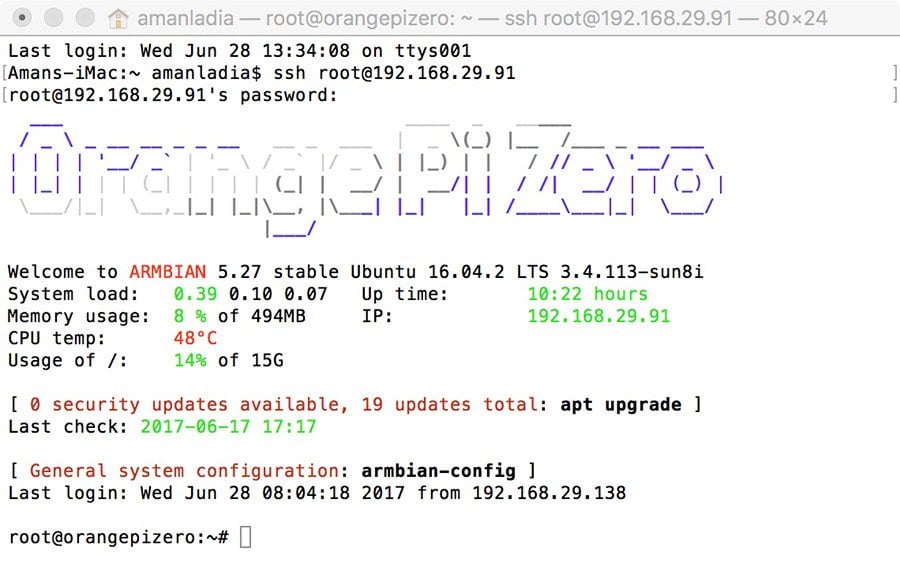
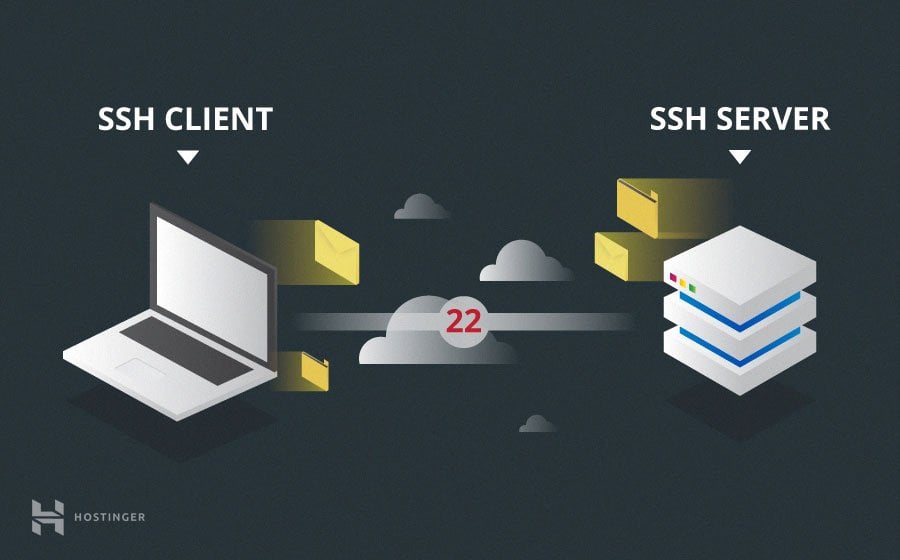
How Does Web SSH Work?
Think of Web SSH as a secure tunnel that lets you send commands to your IoT devices over the internet. When you connect via Web SSH, your browser talks to a server that forwards your commands to the device. It’s like having a virtual handshake with your IoT setup, ensuring everything stays secure and private.
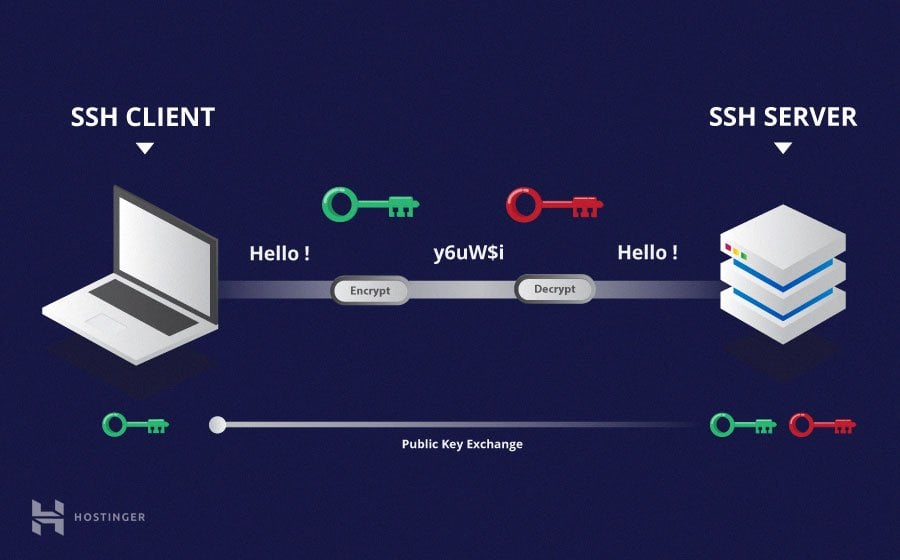
- Web SSH uses encryption to protect your data.
- It supports two-factor authentication for added security.
- You can manage multiple devices from a single interface.
Why Use Web SSH for Remote IoT?
Now, you might be wondering, “Why bother with Web SSH when I can just use a regular SSH client?” Great question! Here’s why Web SSH is a game-changer for remote IoT management:
First off, convenience. With Web SSH, you don’t need to install any extra software. All you need is a browser and an internet connection. This makes it perfect for situations where you’re using a shared or public computer.
Second, security. Web SSH uses the same robust encryption protocols as traditional SSH, ensuring your data stays safe from prying eyes. Plus, you can set up two-factor authentication to add an extra layer of protection.
Read also:Dr Dre Zodiac Sign Unlocking The Secrets Behind The Music Legends Star Sign
Benefits of Using Web SSH for IoT
- Easy to use and set up.
- Works on any device with a browser.
- Highly secure with encryption and authentication options.
- Perfect for managing multiple IoT devices from one place.
Getting Started with RemoteIoT Web SSH
Ready to get your hands dirty? Let’s walk through the steps to set up RemoteIoT Web SSH on your devices. Don’t worry; it’s not as complicated as it sounds.
Step 1: Install the RemoteIoT Web SSH server on your IoT device. This can usually be done using a package manager like apt or yum, depending on your operating system.
Step 2: Configure the server settings. This includes setting up usernames, passwords, and enabling two-factor authentication if you want that extra layer of security.
Step 3: Access the Web SSH interface through your browser. Simply enter the IP address or domain name of your device, and you’ll be good to go.
Tips for a Smooth Setup
- Make sure your IoT device is connected to the internet.
- Double-check your firewall settings to allow incoming connections.
- Test the connection from different devices to ensure everything works as expected.
Securing Your Web SSH Connection
Security is a big deal when it comes to remote IoT management. You don’t want unauthorized access to your devices, right? Here’s how you can keep your Web SSH connection secure:
First, always use strong passwords. Avoid using common words or phrases, and make sure your password is a mix of letters, numbers, and symbols. Trust me, this will save you a lot of headaches down the line.
Second, enable two-factor authentication. This adds an extra layer of security by requiring a second form of verification, like a code sent to your phone, before granting access.
Best Security Practices
- Regularly update your RemoteIoT Web SSH server to patch any vulnerabilities.
- Limit access to trusted IP addresses if possible.
- Monitor your logs for any suspicious activity.
Common Issues and Troubleshooting
Even with the best setup, things can go wrong sometimes. Here are some common issues you might encounter with RemoteIoT Web SSH and how to fix them:
Problem: Can’t connect to the Web SSH interface. Solution: Check your network settings and ensure the device is reachable from your location. Also, verify that the Web SSH server is running and properly configured.
Problem: Slow connection speeds. Solution: Try optimizing your network settings or switching to a faster internet connection. Sometimes, a simple reboot of your router can work wonders.
Quick Troubleshooting Tips
- Restart the Web SSH server if you’re experiencing issues.
- Check your firewall settings to ensure they’re not blocking the connection.
- Consult the official RemoteIoT Web SSH documentation for more help.
Advanced Features of RemoteIoT Web SSH
Once you’ve got the basics down, it’s time to explore some of the advanced features that make RemoteIoT Web SSH truly powerful. For example, did you know you can automate tasks using scripts? Or that you can set up alerts for specific events on your IoT devices?
Here’s a quick rundown of some advanced features:
- Script automation for repetitive tasks.
- Event-based alerts for critical issues.
- Customizable dashboards for monitoring multiple devices.
How to Use Automation Scripts
Automation scripts can save you tons of time by handling repetitive tasks for you. For instance, you can set up a script to automatically update your device’s firmware or run diagnostic checks at regular intervals.
Integrating Web SSH with IoT Platforms
Web SSH isn’t just limited to standalone devices. You can integrate it with popular IoT platforms like AWS IoT, Microsoft Azure IoT, and Google Cloud IoT. This allows you to manage your entire IoT ecosystem from a single interface.
For example, you can use Web SSH to configure device settings, monitor performance metrics, and even deploy new firmware updates—all from the comfort of your browser.
Steps to Integrate with AWS IoT
- Set up an AWS IoT account if you haven’t already.
- Connect your RemoteIoT Web SSH server to AWS IoT using the provided APIs.
- Configure your devices to communicate with AWS IoT through the Web SSH interface.
Best Practices for Remote IoT Management
Managing IoT devices remotely requires a strategic approach. Here are some best practices to keep in mind:
- Regularly back up your device configurations and data.
- Keep your firmware and software up to date.
- Document your setup and configurations for future reference.
By following these best practices, you’ll ensure your IoT devices remain secure and perform optimally over time.
Real-World Use Cases
Let’s talk about some real-world examples of how RemoteIoT Web SSH is being used today. From smart homes to industrial automation, the possibilities are endless.
For instance, a manufacturing company might use Web SSH to monitor and control production equipment remotely. Or a homeowner could use it to adjust the thermostat or lighting in their smart home from anywhere in the world.
Case Study: Smart Farming
One fascinating use case is in smart farming, where farmers use IoT devices to monitor soil moisture, temperature, and other environmental factors. With RemoteIoT Web SSH, they can access this data and make adjustments to their irrigation systems in real time, leading to more efficient water usage and better crop yields.
Future of RemoteIoT Web SSH
As IoT continues to grow, so does the importance of tools like RemoteIoT Web SSH. In the future, we can expect even more advanced features, such as AI-driven automation and seamless integration with emerging technologies like 5G.
Who knows? Maybe one day, managing IoT devices will be as easy as sending a text message. But until then, RemoteIoT Web SSH remains one of the best tools for remote IoT management.
What’s Next for IoT?
With the rapid advancements in technology, the future of IoT is bright. Expect to see more innovations in device security, data analytics, and user interfaces. And with tools like Web SSH leading the way, the possibilities are truly limitless.
Conclusion
And there you have it—a comprehensive guide to RemoteIoT Web SSH. From setting it up to exploring advanced features, we’ve covered everything you need to know to take your IoT management to the next level.
Remember, security is key. Always use strong passwords, enable two-factor authentication, and keep your software updated. By following these best practices, you’ll ensure your IoT devices remain safe and perform as expected.
So, what are you waiting for? Dive into the world of RemoteIoT Web SSH and start managing your IoT devices like a pro. Don’t forget to share this guide with your friends and leave a comment below if you have any questions or tips of your own. Happy hacking!
